

♥ Wishlist
Compare 55 verified Guide Rails for Circular Saws & Precision Cutting products in United Kingdom. Reviews, ratings, pros, cons and buying advice updated for October 2026.


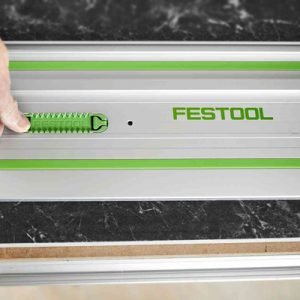


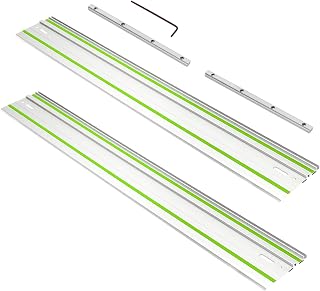


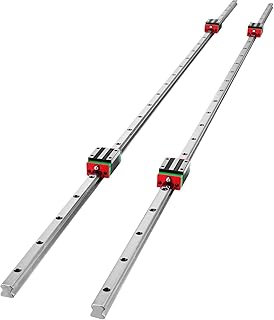


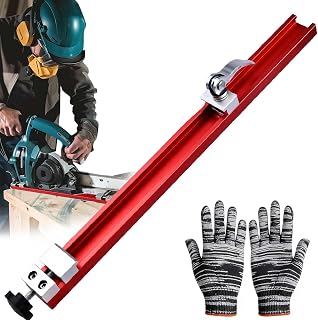


The right guide rail can make a noticeable difference to the accuracy, repeatability and finish of sheet-material cutting. However, choosing a rail is not simply a matter of selecting the longest or most expensive option. The important factors include compatibility with your saw or router, rail length, guide profile, anti-slip performance, splinter protection, joining options, clamping arrangements, portability and the type of work you regularly carry out.
A guide rail should be treated as part of a cutting system rather than an isolated accessory. A well-made rail cannot compensate for an incompatible saw, incorrectly adjusted guide interface or poorly supported workpiece. Conversely, a suitable rail paired with the correct tool can make long straight cuts considerably easier to control and repeat.
Compatibility should be the first check before comparing materials, lengths or prices. Guide rails are not universally interchangeable, even when they look similar. The underside profile, guide channel, anti-friction strips and interface used by one manufacturer may differ from another.
Brands such as Festool, Bosch Professional, Makita and DeWalt have established guide-rail systems, while other manufacturers including Triton, Evolution and Mafell also offer products aimed at particular tool ranges. The safest approach is to begin with the saw or router model and work backwards to the appropriate rail.
Rail length affects both cutting capability and convenience. A short rail is easier to transport and store, while a longer rail can guide a cut across a large sheet without needing to reposition the guide.
Shorter rails can be useful for compact workpieces, cross-cutting, trimming panels and jobs where portability matters more than maximum cutting length. They are also easier to handle when working in confined spaces.
For occasional DIY work, a compact rail may be sufficient if most projects involve relatively small boards or sections of sheet material. A shorter rail can also be practical as a secondary rail alongside a longer one.
Medium-length rails are often the most versatile choice for general workshop and site work. They provide enough guidance for many common sheet-material cuts without becoming unnecessarily awkward to transport.
Before choosing a medium rail, measure the longest cut you normally make rather than the largest sheet you might encounter. The rail needs to provide enough supported travel for the saw throughout the cut, with adequate room for positioning at the start and finish.
Long rails are useful when cutting full-size boards, worktops, doors and other large panels. They reduce the need to reposition the guide, which can help preserve alignment over a long cut.
The trade-off is transport and storage. A long aluminium rail can be awkward to carry, especially on a busy building site or when travelling in a smaller vehicle. For frequent professional use, joining systems can sometimes be a more practical solution than owning one exceptionally long rail.
Some systems allow two or more rails to be joined with dedicated connectors. This can provide greater flexibility because shorter rails are easier to transport and can be used individually for smaller jobs.
When comparing joining systems, look beyond the fact that a connector is available. The quality of the connection, ease of alignment and resistance to movement are all important. A poorly joined rail can introduce a slight change in direction that becomes much more noticeable over a long cut.
Most professional guide rails use aluminium as the main structural material because it provides a useful combination of low weight, rigidity and dimensional stability. The aluminium extrusion forms the backbone of the rail, while other components provide grip, sliding surfaces and protection at the cutting edge.
An aluminium rail should remain sufficiently rigid under normal handling and use. Rigidity becomes particularly important on longer rails because even small amounts of flex can affect how confidently the tool follows the intended line.
Look for a clean, well-finished extrusion with a guide surface that feels consistent from one end to the other. Check the edges and ends for damage if buying from a retailer, particularly where the rail may have been transported or stored without adequate protection.
Non-slip strips help prevent the rail from moving across the workpiece during cutting. They also reduce the amount of manual pressure needed to keep the guide in position.
Do not treat anti-slip material as a substitute for clamps when the job requires maximum security. Dust, sawdust, moisture, rough surfaces and contaminated workpieces can reduce grip. For demanding cuts, particularly on large panels, appropriate clamping may still be advisable.
The interface between the tool and rail should allow smooth travel without excessive side-to-side movement. Too much resistance can make a cut uncomfortable, while excessive play can reduce confidence in the guide.
A smooth-running system is particularly valuable during long cuts because the operator must maintain consistent feed pressure for an extended distance. Dirt and resin can affect the running surfaces, so keeping them clean is part of normal maintenance.
A splinter guard, sometimes called a splinter strip or anti-splinter strip, runs close to the cutting line and helps reduce breakout on the supported side of the material. It can also provide a useful visual indication of where the cut will occur once the system has been correctly set up.
The condition of the splinter strip matters. If it becomes damaged, detached or excessively worn, the quality of the cut can suffer. Replacement strips are therefore an important consideration when comparing guide-rail systems.
Plunge saws are particularly well suited to guide-rail work because their design allows the blade to enter the material from above while the saw remains supported by the rail. This makes the combination useful for controlled panel cutting and work where the starting point of the cut is important.
Some conventional circular saws are also designed to work with guide rails, but compatibility and the method of attaching the saw can vary considerably. A circular saw that appears physically capable of sitting on a rail should not automatically be assumed to be safe or accurate on that system.
Some guide-rail systems can also be used with routers through a dedicated adapter or accessory. This can be useful for producing straight grooves, rebates, recesses and other controlled routing operations.
Router compatibility is especially important because the router base and cutting position must be correctly aligned with the rail. Even a small amount of unwanted movement can affect the position of a groove or recess.
If you intend to use one rail system for both sawing and routing, compare the complete accessory ecosystem rather than the rail alone. The cost and availability of suitable adapters, stops, clamps and replacement parts can have a greater effect on long-term usefulness than the initial rail price.
Many guide rails use high-friction surfaces to reduce movement, but clamps can provide additional security where the material, cutting direction or working conditions make movement more likely.
Clamps are particularly worth considering when working with slippery sheet materials, awkward workpieces or cuts where even a small amount of movement would spoil the result.
A guide rail is only one part of the accuracy equation. The straightness of the rail, the fit between the saw and rail, the position of the guide, the stability of the material and the operator's feed technique all contribute to the final result.
For repeatable work, measure from a known reference edge and position the rail carefully. Do not assume that placing the rail visually along a pencil line will always produce the required finished dimension. Account for the distance between the rail's reference edge and the saw blade according to the specific tool and rail system.
It is also important to distinguish between the position of the guide rail and the actual blade kerf. The rail may indicate the cutting edge, but the exact relationship depends on the tool, blade and guide system.
Not every premium feature provides equal value for every buyer. The best specification depends on how frequently the rail will be used and how demanding the work is.
A low-cost rail can make sense for occasional DIY work, particularly when the user only needs basic guidance for a small number of projects. However, the lowest purchase price is not necessarily the lowest long-term cost.
Professional users should consider the entire ownership system. A rail that accepts readily available replacement strips, connectors and clamps may be more useful over several years than a cheaper rail with limited accessories.
A longer rail is not automatically better. If it is difficult to transport or store, it may spend more time leaning against a wall than being used. Choose the length based on your normal work and consider a joining system if you need occasional extra reach.
This is one of the most important mistakes to avoid. Similar-looking rails can have different guide interfaces. Always verify compatibility with the exact tool model.
Splinter strips, anti-slip components and connectors can wear or become damaged. Before choosing a rail for long-term use, consider whether the manufacturer's replacement components are readily identifiable and appropriate for the model.
A guide rail can be straight and accurate when new but become damaged if it is repeatedly transported without protection. Think about where the rail will be stored and how it will be carried to a job.
Do not treat dents, severe bends, damaged guide surfaces or loose components as cosmetic problems. A compromised rail can affect both accuracy and safe tool movement.
A guide rail cannot correct a sheet that moves during cutting. Support the workpiece appropriately and ensure that the planned cut does not leave an unstable section unsupported.
When comparing several guide rails, use the same criteria for each option rather than concentrating on one headline feature.
For DIY users, the best guide rail is usually the one that offers straightforward compatibility with an existing saw and enough length for the majority of planned projects. There is little benefit in buying an advanced professional system if its additional features will rarely be used.
A sensible DIY purchase should prioritise predictable tool movement, good grip, adequate length and readily understandable setup. If you expect your woodworking projects to become more ambitious over time, it can also be worth considering the wider accessory ecosystem before making the initial purchase.
Professional users should place greater emphasis on repeatability, durability, accessory availability and compatibility across the tools already used in the workshop or on site.
A professional guide rail may be used repeatedly throughout the working day, so small differences in setup time can become significant. A system that allows efficient joining, reliable positioning and straightforward replacement of worn components can therefore be more valuable than a rail selected solely on its initial cost.
Brands such as Festool, Bosch Professional, Makita and DeWalt are commonly associated with professional power-tool ecosystems, but the best choice remains dependent on the tools already in your workshop. A rail should be evaluated as part of that ecosystem rather than by brand reputation alone.
Guide rails are particularly useful when cutting plywood, MDF, chipboard, laminated panels and other sheet materials where a long, straight cut is difficult to achieve freehand.
For finished or decorative surfaces, splinter control becomes more important. The blade, cutting direction and material structure also influence the final edge, so a good rail should be combined with an appropriate blade and suitable cutting technique.
Large sheets deserve particular attention. Before cutting, make sure the panel is supported so that the cut does not cause the material to pinch the blade or shift against the guide. The rail should remain stable from the beginning to the end of the cut.
Worktops and large panels can require longer and more carefully positioned guides than smaller boards. A rail that is too short may force repositioning during the cut, creating another opportunity for alignment errors.
For long worktop cuts, consider both the overall cutting length and the physical space available around the workpiece. The operator needs enough room to control the saw comfortably without pushing against walls, cabinets or other obstacles.
A guide rail improves control, but it does not remove the normal hazards associated with power tools. Follow the operating instructions for the saw or router and use appropriate protective equipment for the work being performed.
Routine maintenance is straightforward but important. Dust, resin, adhesive residue and other debris can accumulate on the rail and interfere with smooth tool movement or reduce the effectiveness of anti-slip surfaces.
After use, remove dust and loose debris from the rail. Pay particular attention to the guide surfaces and channels used by the saw or accessory. Avoid methods or cleaning products that could damage rubber strips, adhesive components or protective surfaces.
Check the splinter strip regularly for damage or separation. A worn strip may no longer provide the same edge support or reference function as a new one.
Look for dents, bends or other damage that could interfere with the saw's movement. A small defect near the start of a rail may become especially noticeable when the tool passes over it repeatedly.
Store rails where they are unlikely to be stepped on, crushed or bent. Long rails benefit from a storage position that supports them adequately rather than leaving them where accidental impact is likely.
There is no universal replacement interval for a guide rail. Service life depends on construction, frequency of use, transportation, storage, working environment and accidental damage.
The rail itself may remain usable for a long period while consumable components such as splinter strips or anti-slip elements require earlier replacement. Rather than replacing a rail simply because it has been used for a certain number of years, inspect its condition and check whether it continues to provide reliable guidance.
When reading customer reviews, focus on useful evidence rather than relying solely on the overall star rating. A guide rail can receive positive feedback for one type of use while being unsuitable for another.
Customer feedback is most useful when combined with manufacturer specifications. Reviews can reveal practical issues, but specifications remain important for confirming dimensions, compatibility and included accessories.
If two guide rails appear similar, the decision can be narrowed down by considering which characteristics matter most for your work.
The answer depends on how often the rail will be used and how much you value repeatability. A premium system can make more sense for someone making frequent precision cuts than for someone completing a handful of DIY projects each year.
Do not judge value from the rail price alone. Consider the cost of connectors, clamps, replacement strips and other accessories that may be needed over time. A slightly more expensive system may provide better value if it integrates effectively with tools you already own.
Check the exact tool model against the manufacturer's compatibility information. Similar-looking saws within the same range are not necessarily identical in their guide-rail interfaces.
Choose a length that covers the cuts you make most often. If you occasionally need a substantially longer cutting path, a system with reliable connectors can offer greater flexibility.
Not always. Some rails use high-friction strips to resist movement, but clamps can provide additional security when the material or cutting operation demands it.
Sometimes, but this depends entirely on the manufacturer's compatibility specifications. Some rail ecosystems support several tools or require adapters for particular applications.
They can be useful for beginners because they provide a defined cutting path, but they still require correct setup and safe operation. New users should understand the tool manufacturer's instructions before attempting precision cuts.
Some guide systems can be used for angled or bevel cutting, but the exact capability depends on the saw, rail and setup. Check the specifications for the particular system rather than assuming every rail supports every cutting angle.
Some systems support routers through dedicated adapters. If routing is an important part of your work, check the complete accessory range rather than buying a rail based solely on its suitability for a circular saw.
The best guide rail is the one that fits your existing tool, suits the material and dimensions of your typical projects, and provides the level of accuracy and convenience you genuinely need. Compatibility should come before brand, length or price, because a rail that does not properly match the tool will not deliver the expected benefits.
For occasional DIY users, a straightforward compatible rail with effective grip and a sensible length is often the most practical choice. For regular woodworking or professional use, it is worth looking more closely at rail rigidity, replacement splinter protection, connectors, clamps, accessory compatibility and long-term maintenance.
Before buying, compare the complete specification, confirm compatibility with your exact model, read verified customer feedback and check current prices from trusted UK retailers. A careful comparison at this stage can prevent the common mistake of choosing a rail that looks suitable but does not work effectively with the tool you already own.