

♥ Wishlist
Compare 56 verified Milwaukee Sanding Belts products in United Kingdom. Reviews, ratings, pros, cons and buying advice updated for October 2026.


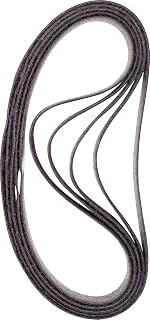


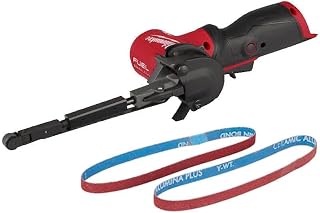
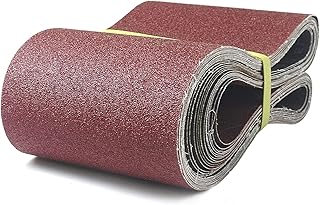



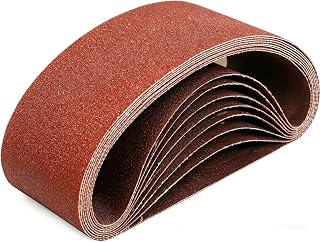


One of the easiest mistakes when buying replacement sanding belts is choosing the correct grit but the wrong physical size. A sanding belt is not a universal accessory simply because it is labelled as a Milwaukee product. The belt length and width must match the sanding machine, and the manufacturer's specified dimensions should take priority over assumptions based on appearance.
Milwaukee's current UK sanding-belt range covers several dimensions, including 75 x 457 mm, 75 x 533 mm, 100 x 560 mm, 100 x 610 mm and 100 x 620 mm options. The manufacturer's current UK information also identifies the 75 x 457 mm format as suitable for the M18 FUEL 75 mm belt sander and the 100 x 620 mm format for the BS 100 LE.
Before ordering, compare the dimensions printed on the existing belt, the specification plate or manual for the machine, and the manufacturer's accessory information. Do not assume that two belts with the same width are interchangeable if their lengths differ.
The 75 x 457 mm format is particularly relevant to the M18 FUEL 75 mm belt sander. Milwaukee lists this belt size with several grit choices, including 40, 60, 80, 100 and 150 grit. The current manufacturer's catalogue identifies five belts per pack for these listed 75 x 457 mm variants.
This size is worth considering when compact dimensions and compatibility with the relevant Milwaukee belt sander are more important than simply finding the largest abrasive surface available. The 75 mm width also makes it important to maintain an even sanding motion so that excessive pressure on one edge does not create an uneven finish.
Milwaukee also lists 75 x 533 mm belts in a range of grits from coarse through relatively fine preparation grades. The current UK catalogue identifies 40, 60, 80, 100 and 150 grit options in this size, with five belts per pack.
Although the width is the same as the 75 x 457 mm format, the additional belt length means these should not be treated as substitutes. Belt length is part of machine compatibility, not merely a secondary specification.
The 100 x 560 mm category is another distinct size within Milwaukee's accessory range. The current catalogue lists 40 and 150 grit variants, while the manufacturer's product information also identifies the 100 x 560 mm format within its belt-sander accessory system.
For buyers comparing several apparently similar listings, the important point is to verify the complete dimension rather than selecting a belt because the width alone looks appropriate.
Milwaukee's current UK catalogue lists 100 x 610 mm belts in 40, 60, 80, 100 and 150 grit. These are supplied in packs of five according to the catalogue.
This size can be relevant for larger belt-sanding applications where the machine specification calls for a 100 mm wide, 610 mm long belt. Again, compatibility should be confirmed against the particular machine rather than inferred from the belt's dimensions alone.
The 100 x 620 mm format is another separately specified belt size. Milwaukee's UK accessory information associates 100 x 620 mm belts with its BS 100 LE, while its current belt-sander range includes this paper size among the available dimensions.
If your machine requires 620 mm rather than 610 mm, the difference is small enough to be overlooked when shopping but significant enough to make a belt unsuitable. Treat the exact machine specification as the deciding factor.
Grit is one of the most important specifications because it determines the type of sanding work for which a belt is most appropriate. A lower grit number represents a coarser abrasive, while a higher grit number represents a finer abrasive. The practical choice therefore depends on how aggressively material needs to be removed and how smooth the surface needs to become afterwards.
Milwaukee's belt-sander range currently includes a selection of coarse, medium and finer grades, with listed options including 40, 60, 80, 100, 120, 150, 220 and 240 depending on the belt format and application.
40 grit is a coarse choice intended for situations where substantial material removal is more important than achieving a finished surface. It can be useful when flattening rough timber, removing old coatings or rapidly reducing high spots, provided the material and machine are suitable for belt sanding.
The main risk with a coarse belt is removing more material than intended. On softer timber, staying in one location for too long can create depressions, rounded edges or visible sanding marks. Use controlled passes rather than treating the belt like a stationary grinding wheel.
60 grit remains relatively aggressive but offers more control than the coarsest grades. It can be a useful compromise when a 40-grit belt feels unnecessarily harsh but a finer abrasive would take too long to remove the existing surface.
For timber preparation, the correct pressure and movement can matter as much as the nominal grit. Excessive downward pressure can reduce the benefit of moving to a slightly finer grade because it can increase cutting aggressiveness and make it easier to produce uneven areas.
80 grit is a common middle-ground choice for general preparation. It can remove material reasonably efficiently while leaving a surface that can subsequently be refined with a finer abrasive.
It is particularly useful when the objective is not the final polished or decorated finish but a controlled intermediate stage before progressing through finer abrasives.
100 grit provides a finer level of abrasion than 40, 60 or 80 grit. It is often better suited to preparing an already reasonably smooth surface rather than correcting major defects.
When working through a grit sequence, changing to 100 grit after a coarser stage can help remove the deeper scratches left by the earlier abrasive. The exact sequence depends on the material, coating and desired finish.
150 grit is suitable where the sanding objective has moved towards surface refinement rather than rapid stock removal. Milwaukee lists 150 grit across several of its current belt sizes.
Some Milwaukee sanding-belt formats also extend to finer grades such as 220 and 240. These can be appropriate where the machine, material and finishing process call for a finer abrasive. A finer belt should not automatically be regarded as better: if substantial material still needs removing, using an excessively fine belt can make the job slower without improving the final result.
Milwaukee describes its cloth sanding belts as suitable for materials including wood, metal, paint, lacquer and plaster. The current UK product information specifies fused alumina abrasive with a half-open grit arrangement and an artificial resin bond on special fabric.
Those specifications are useful when comparing belts because the abrasive grain, backing and coating system all influence how a belt behaves. Buyers should still distinguish between a belt intended for general sanding and a specialised abrasive belt designed for metal grinding or another particular application.
For timber, the appropriate belt depends on whether the task is stock removal, flattening, preparation or finishing. Coarser belts can be useful for removing material quickly, whereas finer grades are better suited to refining the surface after the main shaping work has been completed.
Pay particular attention to the direction of sanding and the way the belt approaches edges. A powerful belt sander can remove material quickly enough to alter a corner before the operator has time to correct the movement.
Removing old paint or lacquer places different demands on an abrasive from ordinary timber sanding. The coating can load the belt, reducing its cutting effectiveness and potentially causing the operator to apply more pressure.
Where coating removal is the primary objective, inspect the belt regularly. If the abrasive surface becomes clogged or glazed, continuing to press harder is not necessarily the solution. A fresh, correctly selected abrasive can be more effective than excessive pressure.
Milwaukee's general sanding belts are listed for metal as well as wood, paint, lacquer and plaster. However, metalworking can require a different abrasive strategy depending on whether the job involves surface preparation, deburring, weld blending, shaping or finishing.
Do not confuse general sanding belts with Milwaukee's dedicated abrasive belts for its band-file range. Those specialised belts use ceramic grain and are designed for high material removal on metal weld seams, contours, edges and profiles. Milwaukee lists them for steel, non-ferrous metals, aluminium, titanium and stainless steel, with 60, 80 and 120 grit options depending on belt size.
Milwaukee identifies plaster among the materials for which its general cloth sanding belts can be used. The suitability of any belt should nevertheless be considered alongside the machine, dust-management arrangement and working environment.
Fine dust can affect both the work area and equipment, so extraction and appropriate personal protective equipment should be considered according to the material and manufacturer's safety guidance.
Not every Milwaukee abrasive belt is intended to behave in the same way. The general sanding belts use fused alumina, while Milwaukee's dedicated abrasive belts for band files use ceramic grain.
Fused alumina is well suited to general-purpose sanding across materials such as wood, metal, paint, lacquer and plaster. Ceramic abrasives are commonly selected where high stock removal and demanding metalworking performance are priorities.
The correct choice therefore depends on the tool as well as the workpiece. A ceramic band-file belt is not a substitute for a correctly sized general sanding belt simply because ceramic sounds more advanced. The belt must be designed for the particular machine and application.
Milwaukee specifies a half-open grit construction for its general cloth sanding belts. The spacing between abrasive particles can affect how readily debris occupies the spaces between grains.
For materials that generate considerable sanding debris, loading can become a practical issue. A belt that initially cuts effectively may become less productive as particles and removed material accumulate on the abrasive surface.
This is one reason that belt life should not be judged solely by how long the physical backing remains intact. The useful life of an abrasive also depends on whether it continues cutting effectively and producing the required surface quality.
A sensible selection process starts with the machine rather than the abrasive. Identify the exact belt dimensions, then determine the material being sanded, the amount of material that must be removed and the required final surface.
If the surface is rough, uneven or heavily coated, start by considering whether a coarse abrasive is justified. If the surface is already relatively smooth, jumping straight to an aggressive belt can create unnecessary damage and additional finishing work.
A belt that removes material rapidly is not necessarily the belt that produces the final appearance you want. A multi-stage sanding process is often more controlled: remove material with a suitable coarse or medium abrasive, then refine the scratches with progressively finer grades where necessary.
Occasional DIY use and frequent trade use can justify different purchasing priorities. A homeowner working on one small project may value an appropriate multipack and sensible grit selection, whereas a professional user may place greater emphasis on consistent availability, predictable abrasive behaviour and the cost of achieving a particular amount of finished work.
Pack quantity deserves more attention than it often receives in product comparisons. A low headline price is not necessarily the best value if the pack contains fewer belts or if the grit is unsuitable for the job.
Milwaukee's current UK accessory information lists five belts in several general sanding-belt formats, including 75 x 457 mm, 75 x 533 mm and 100 x 610 mm options. Other formats or specialist abrasive belts can have different pack quantities, so the individual product specification should always be checked.
For a meaningful comparison, consider the price per belt as well as the pack price. Then consider whether the belt is actually appropriate for your machine and project. Paying less for an incompatible belt is false economy.
Grit is important, but it is only one part of compatibility. A 60-grit belt that does not match the machine's required dimensions is not a useful purchase.
Milwaukee has both belt-sanding products and narrower band-file systems. Its current range includes 10 x 330 mm and 13 x 457 mm abrasive-belt formats for the M12 FUEL band-file tools. These should not be confused with wider belt-sander accessories such as 75 x 457 mm or 100 x 620 mm belts.
Brand compatibility is not enough. Milwaukee itself lists different belt dimensions for different belt-sanding machines. Always match the belt to the exact tool.
A fine abrasive can be a poor choice for rapid stock removal. If a board needs substantial material removed, starting with an excessively fine belt can consume time and abrasive without solving the underlying problem efficiently.
More pressure does not automatically produce better sanding. It can make the tool harder to control, accelerate abrasive wear and increase the chance of removing too much material. Allow the abrasive to do the cutting while maintaining a controlled feed movement.
A coarse belt can leave scratches that remain visible after finishing. If appearance matters, plan the complete sanding sequence rather than judging the result solely by how quickly the first belt removes material.
Milwaukee is not the only manufacturer worth considering when selecting abrasive belts. Depending on the machine and application, buyers may also encounter products from Bosch, Makita, DeWalt, 3M, Klingspor and other abrasive manufacturers.
The fairest comparison is not simply brand against brand. Compare the exact belt size, grit, abrasive type, backing, intended material, pack quantity and stated machine compatibility.
There is a straightforward reason to favour a manufacturer-matched belt: compatibility and specification checking are easier when the accessory is explicitly listed for the relevant tool system. Milwaukee's UK accessory range provides belt dimensions and compatible sanding-tool information, which can reduce guesswork when selecting the appropriate accessory.
That does not mean every Milwaukee belt is automatically the best option for every job. Independent buyers should still compare abrasive construction, grit availability, pack quantity, application and total cost with suitable alternatives.
A new belt cannot compensate for a machine that is incorrectly adjusted or poorly maintained. Before fitting an abrasive, disconnect the machine from its power source according to the manufacturer's instructions and inspect the belt path, rollers and surrounding components.
Milwaukee's M18 FUEL 75 mm belt sander, for example, uses a tool-free belt-change system with adjustment of the belt roller for alignment. The machine is specified for a 75 x 457 mm belt.
Abrasive life is influenced by the material, pressure, speed, dust management and technique. Two users can consume belts at very different rates even when using the same tool and grit.
Let the abrasive contact the surface without forcing the machine aggressively into the work. Excessive pressure can increase heat, affect the finish and reduce the practical usefulness of the abrasive.
When the workpiece and tool permit, maintain a controlled movement rather than allowing the belt to dwell in one place. This helps reduce the risk of grooves, hollows and uneven removal.
Do not expect a fine belt to perform the work of a coarse belt or a coarse belt to produce a fine finish without additional sanding. Selecting the correct grade at each stage can reduce unnecessary belt consumption.
If the abrasive surface becomes heavily loaded with removed material, cutting performance can decline. Continuing to press harder may simply increase wear and heat rather than restoring effective cutting.
Dust extraction is important for both the working environment and equipment cleanliness. Milwaukee states that its M18 FUEL 75 mm belt sander can capture 90% of dust through its universal dust port or multi-layer dust bag under the manufacturer's specified conditions.
That machine-specific claim should not be interpreted as meaning that every sanding setup captures the same proportion of dust. Actual dust control depends on the machine, accessory, extraction system, material and working conditions.
A belt does not necessarily need to be replaced because the backing has visibly deteriorated. Abrasive performance can decline before the belt appears physically damaged.
Never continue using an abrasive belt that is damaged or unsuitable for the machine. Follow the tool and accessory manufacturer's safety instructions for inspection, fitting and replacement.
DIY buyers rarely need every available grit. A more sensible approach is to select a small range that matches the type of work being undertaken. For example, a project involving rough timber preparation may need a coarse and medium grade, followed by a finer abrasive if the surface is going to be painted, stained or otherwise finished.
Buying a mixed collection can make sense if you genuinely expect to use the different grades. Otherwise, paying for unused grits can make an apparently economical multipack less useful.
For frequent use, consistency can become more important than the lowest purchase price. A professional user should consider how quickly belts are consumed, whether the required grit and size are consistently available, how well the abrasive suits the material and whether the belt produces a predictable finish.
It can also be useful to standardise belt sizes and grit sequences across commonly used machines. This reduces the chance of fitting the wrong accessory and makes stock management simpler.
Workshop users working across timber and metal should be particularly careful about separating general-purpose sanding belts from specialist metalworking abrasives. Milwaukee's current range includes general cloth sanding belts as well as ceramic abrasive belts intended for band-file metal applications.
For metal fabrication, determine whether the task is surface preparation, weld removal, edge shaping, blending or finishing. The best abrasive for one of these jobs may be inappropriate for another.
Sanding belts remove material rapidly, so safe operation depends on both the tool and the accessory. Read the machine manufacturer's instructions before use and follow the safety requirements for the material being sanded.
Sanding belts are only one part of the wider sanding system. Milwaukee's UK range also includes belt-sander accessories and replacement components. Its accessory information includes items such as a dust bag, sanding bases and clamps for certain belt-sanding applications.
A clamp can be particularly relevant where a portable belt sander is being used in a stationary arrangement, but suitability depends on the specific machine and the work being carried out. Buyers should always confirm the accessory's compatibility before purchasing.
For most projects where the surface quality matters, a single grit is unlikely to be the complete answer. Coarse sanding and finishing have different requirements.
A typical progression might move from a coarse grade for substantial removal to a medium grade for surface preparation and then to a finer grade for refinement. The precise progression should be adjusted according to the material and the scratches left by the preceding abrasive.
There is no universal rule that every project must use a particular sequence. The practical test is whether the current abrasive is efficiently performing its intended stage without creating more damage or work than necessary.
When comparing retailer listings, work through the specification in a fixed order. This reduces the risk of buying a visually similar but technically unsuitable accessory.
Product names can vary between retailers, particularly when listings abbreviate dimensions or combine several grit options into one product page. A manufacturer article number can provide a more precise way of identifying the intended accessory.
Milwaukee's current UK information provides article numbers alongside belt dimensions, grit and EAN information for its listed sanding belts. When two retailer listings appear almost identical, checking the manufacturer's identifier can help determine whether they actually refer to the same product.
There is no single best sanding belt for every project. The most suitable choice changes according to the machine, material and desired result.
Milwaukee's current UK sanding information presents a broader selection of paper sizes and grit options than a buyer might expect from a basic replacement-belt category. The current range includes different widths and lengths for different belt-sanding tools, while the manufacturer also distinguishes general sanding belts from band-file abrasives and other sanding accessories.
This makes specification checking increasingly important. A large product category containing several visually similar belts can create more opportunities for a size or application mismatch, particularly when shopping through retailer filters.
A good belt is not simply the one with the highest grit count, longest claimed life or lowest price. It is the belt that is correctly matched to the machine and material and performs the required sanding stage efficiently.
For a meaningful assessment, look at abrasive type, grit, backing construction, belt dimensions, intended material, pack quantity and machine compatibility together. Then consider whether the belt is appropriate for the finish you need.
Milwaukee's general belt-sander products use fused alumina on a special fabric with a resin bond, while its specialist band-file abrasive belts use ceramic grain for demanding metal applications. Those differences illustrate why the phrase "best sanding belt" has to be interpreted in context.
Price comparison becomes more useful when it reflects the actual amount of work a belt can perform for your application. A cheaper belt is not necessarily better value if it wears rapidly, loads quickly or produces a finish that requires additional sanding.
Likewise, a more expensive belt may not represent good value if its additional characteristics are unnecessary for an occasional DIY project. The right comparison is the total cost of achieving the required result.
Storage can affect the condition of abrasive accessories. Keep unused belts in a clean, dry environment and avoid unnecessary exposure to moisture, contamination or physical damage.
Do not crush or sharply fold belts simply to save storage space. Keep them organised by dimension and grit so that the correct belt can be identified quickly when required.
For workshops holding multiple sizes, separate 75 mm, 100 mm and narrow band-file belts rather than storing them in a single mixed container. Clear organisation reduces the risk of fitting the wrong accessory.
For anyone shopping for Milwaukee sanding belts in the UK, compatibility should come before grit, and grit should come before price. Start with the exact belt dimensions required by the machine. Then choose the abrasive grade and construction according to the material and the stage of work.
Milwaukee's current UK range confirms several distinct belt sizes and a range of abrasive grades, with general sanding belts based on fused alumina and specialist band-file belts using ceramic abrasive technology.
The strongest buying decision is therefore not necessarily the belt described as the "best" in a generic ranking. It is the belt whose dimensions, grit, abrasive construction, intended application and pack quantity most closely match the job you actually need to complete.
The best choice depends on the wood, the amount of material being removed and the required finish. Coarser grades are more appropriate for substantial material removal, while medium and finer grades are better suited to preparation and refinement. Milwaukee lists its general cloth sanding belts for wood among other materials.
Milwaukee specifies a 75 x 457 mm sanding belt for the M18 FUEL 75 mm belt sander.
No assumption of interchangeability should be made. Although both are 75 mm wide, their lengths are different. Check the exact belt size specified for the machine before purchasing.
60 grit is substantially coarser and is intended for more aggressive material removal. 120 grit is finer and is generally more appropriate for surface refinement. The correct choice depends on the material and the stage of sanding.
Milwaukee identifies its general cloth sanding belts for metal as well as wood, paint, lacquer and plaster. For more demanding metalworking tasks, Milwaukee also offers specialist ceramic abrasive belts for its band-file tools.
Neither is universally better. Ceramic abrasives are particularly relevant to demanding metal-removal applications, while Milwaukee's fused-alumina cloth belts are designed as general sanding accessories for several materials. Choose according to the machine and application rather than abrasive type alone.
Pack quantity varies by product. Milwaukee's current UK catalogue lists five belts for several general sanding-belt formats, while specialist accessories can have different quantities. Always check the individual product specification before comparing prices.
Potentially, but only if the belt dimensions, construction and other relevant specifications are compatible with the particular machine. Brand matching should never replace checking the exact dimensions and manufacturer's requirements.
For substantially rough or uneven timber, a coarse or medium-coarse grit may be appropriate, depending on how much material needs to be removed. If the surface is already reasonably flat, starting too coarse can create unnecessary scratches and material loss.
Replace an abrasive when it is damaged or when its useful cutting performance has deteriorated to the point that continuing to use it is inefficient. Heavy loading, reduced cutting effectiveness and visible belt damage are practical warning signs.
Usually, not when significant material removal is required. A finer abrasive generally cuts less aggressively. Using a suitable coarse or medium grade for the removal stage and progressing to finer abrasives afterwards is often more efficient.
Not necessarily as a matter of brand alone, but the belt must meet the requirements of the machine. Milwaukee's own range contains several belt dimensions for different tools, so the exact specification matters more than the logo on the machine.
A belt-sander belt is typically much wider and is designed for a belt-sanding machine. Band-file belts are much narrower and are intended for specialised narrow-belt tools. Milwaukee's current band-file abrasive range includes 10 x 330 mm and 13 x 457 mm formats.
If the project involves both material removal and finishing, buying more than one suitable grit can be sensible. If the project has only one defined sanding stage, purchasing unnecessary grades may simply increase unused stock.
They can be, particularly when abrasive performance, consistency and belt consumption matter. However, the benefit depends on the application. For occasional use, the most expensive abrasive may provide little practical advantage if a correctly selected standard belt already meets the project's requirements.
The best Milwaukee sanding belt is the one that precisely matches the tool, material and sanding objective. Current Milwaukee UK specifications show that the range spans multiple belt dimensions and grit grades, so checking compatibility is essential before buying.
For a confident purchase, identify the exact belt size first, choose the grit second, confirm the abrasive type and intended application third, and only then compare pack quantity and overall value. That approach is more reliable than selecting a belt solely because it has a favourable rating, attractive price or prominent position in a retailer's search results.